Background jobs in rails applications make our development lives easier.
We rely on them for a lot of things - common use cases include sending emails, push notifications, processing 3rd party API interactions, transactions and long-running requests that tie up server resources.
In a typical production app, there’s a possibility of processing hundreds of jobs per second under normal circumstances and thousands depending on the number of users and campaign(s) going on.
I’ve been using Resque for a while but recently made a switch to Sidekiq on a few apps. I initially wanted to write about the switch but I soon realized that the knowledge of introducing Sidekiq to a new project is important and the post became really long so I decided to split it up. In this post, I’m going to show you how to use Sidekiq for your background jobs on a new rails app. And in part 2, I’ll write about switching from an existing app on Resque to Sidekiq.
Why Sidekiq?
I made the move for 3 reasons:
Failed jobs on Resque:

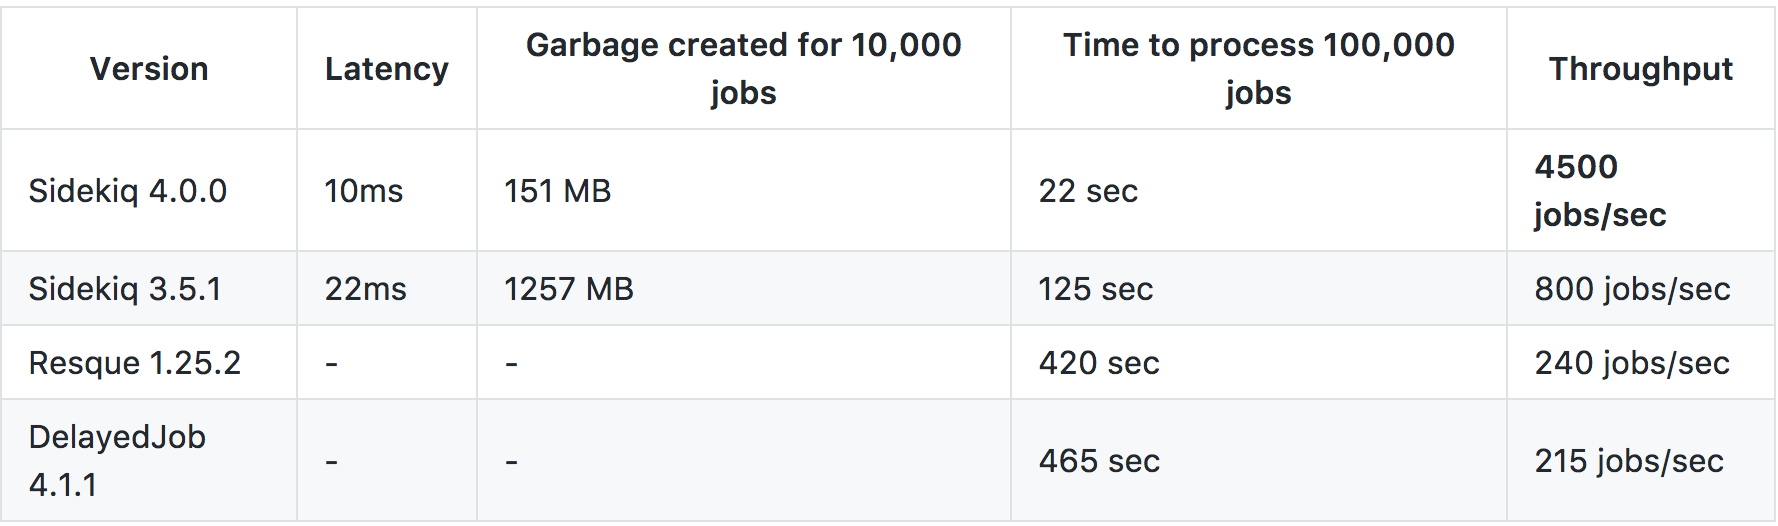
Performance: Apart from dealing with lots of failed jobs, this chart on Sidekiq repository caught my interest so I decided to give it a try.
The developer: I’ve heard of Sidekiq for a while now but didn’t know/care about who was behind it until I read Mike Perham’s story on IndieHackers. You should check it out.
I’ll cover the following:
- Setting up Sidekiq
- Executing the first job with Sidekiq
- Sending email asynchroniously using Sidekiq and Action Mailer
- Monitoring your background jobs on sidekiq web ui
Now let’s get started.
Setting up Sidekiq
Requirements
Sidekiq supports CRuby 2.2.2+ and JRuby 9k.
All Rails releases >= 4.0 are officially supported.
Redis 2.8 or greater is required. 3.0.3+ is recommended for large installations with thousands of worker threads.
***All the setup instructions in this tutorial assume you’re on MacOS and using Homebrew. Your setup steps/commands may vary depending on your development environment’s OS.
Setup Redis
- Install Redis. Sidekiq uses Redis to store all of its job and operational data. You’ll need Redis installed.
$ brew install redis
- If you run different apps on the local redis server environment on your machine. You need to add the gem ‘redis-namespace’ to namespace the redis keys via sidekiq. Otherwise sidekiq will try to execute tasks from one application with another application’s codebase.
gem 'redis-namespace'
Setup Sidekiq
- Add sidekiq to your Gemfile and run
bundle:
gem 'sidekiq'
- Setup Sidekiq’s Redis client and server in an inititalizer
Sidekiq uses Redis to store all of its job and operational data.
By default, Sidekiq tries to connect to Redis at localhost:6379 on your development environment. Before you deploy to production, you will need a to create/provision a production redis server and include the server’s url in your env variables.
- Create a
sidekiq.rbfile in yourconfig/initializersdirectory
# config/initializers/sidekiq.rb

  uri = ENV["REDIS_URL"] || "redis://localhost:6379/0"
  app_name = File.basename(Rails.root.to_s)

  Sidekiq.configure_server do |config|
    config.redis = { url: uri, namespace: "#{app_name}_#{Rails.env}" }
  end

  Sidekiq.configure_client do |config|
    config.redis = { url: uri, namespace: "#{app_name}_#{Rails.env}" }
  end
- Setup
config/sidekiq.yml- if you require advanced setup
---
:concurrency: 1
:queues:
  - default
  - mailers
If you use ActiveJob for your Rails background jobs, you can configure sidekiq to work with ActiveJob. See doc to config Sidekiq to work with ActiveJob. I skipped this in my setup but it’s quite easy to setup.
Run Sidekiq
bundle exec sidekiq --environment development

OR

bundle exec sidekiq --environment development -C config/sidekiq.yml
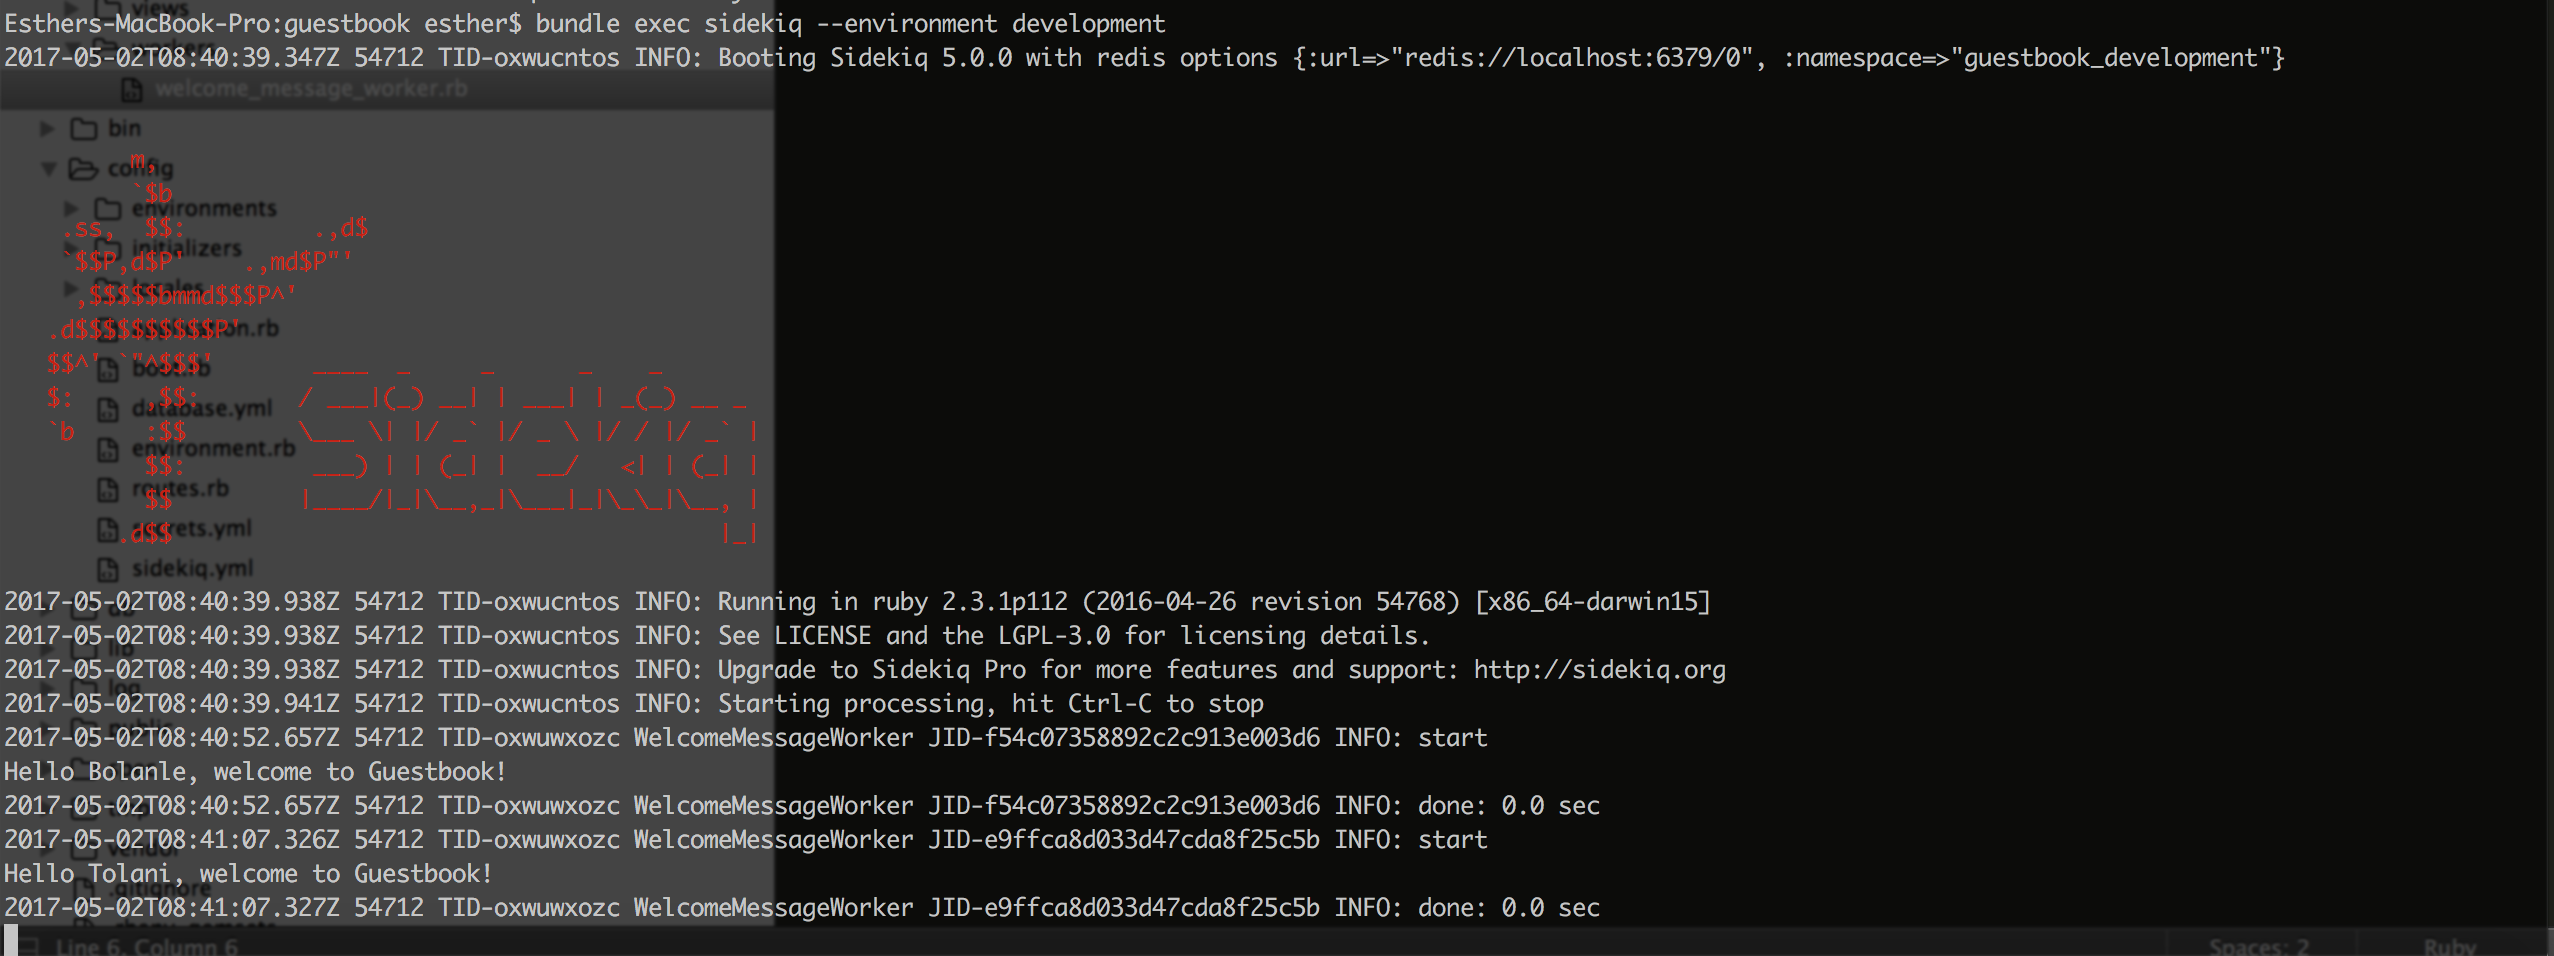
If successful, you’ll get a response like the screenshot below

Execute first job with Sidekiq
Now that we’ve successfully setup sidekiq, let’s create and execute our first job. Note: Background jobs in sidekiq are referred to as sidekiq workers.
- Add a worker in app/workers to process jobs asynchronously We’ll create a job that logs welcome message for a new entry in the guestbook.
rails g sidekiq:worker WelcomeMessage # will create app/workers/welcome_message_worker.rb
# app/workers/welcome_message_worker.rb
class WelcomeMessageWorker
  include Sidekiq::Worker

  def perform(name)
    puts "Hello #{name}, welcome to Guestbook!"
  end
end
- Call the background on successful creation of an entry.
# app/models/entry.rb

class Entry < ActiveRecord::Base
  validates :name, :message, presence: true

  after_create :send_welcome_message

  def send_welcome_message
    WelcomeMessageWorker.perform_async(self.name)
  end

end
You can also create a job to be processed in the future:
  def send_welcome_message
    WelcomeMessageWorker.perform_in(5.minutes, self.name)
  end
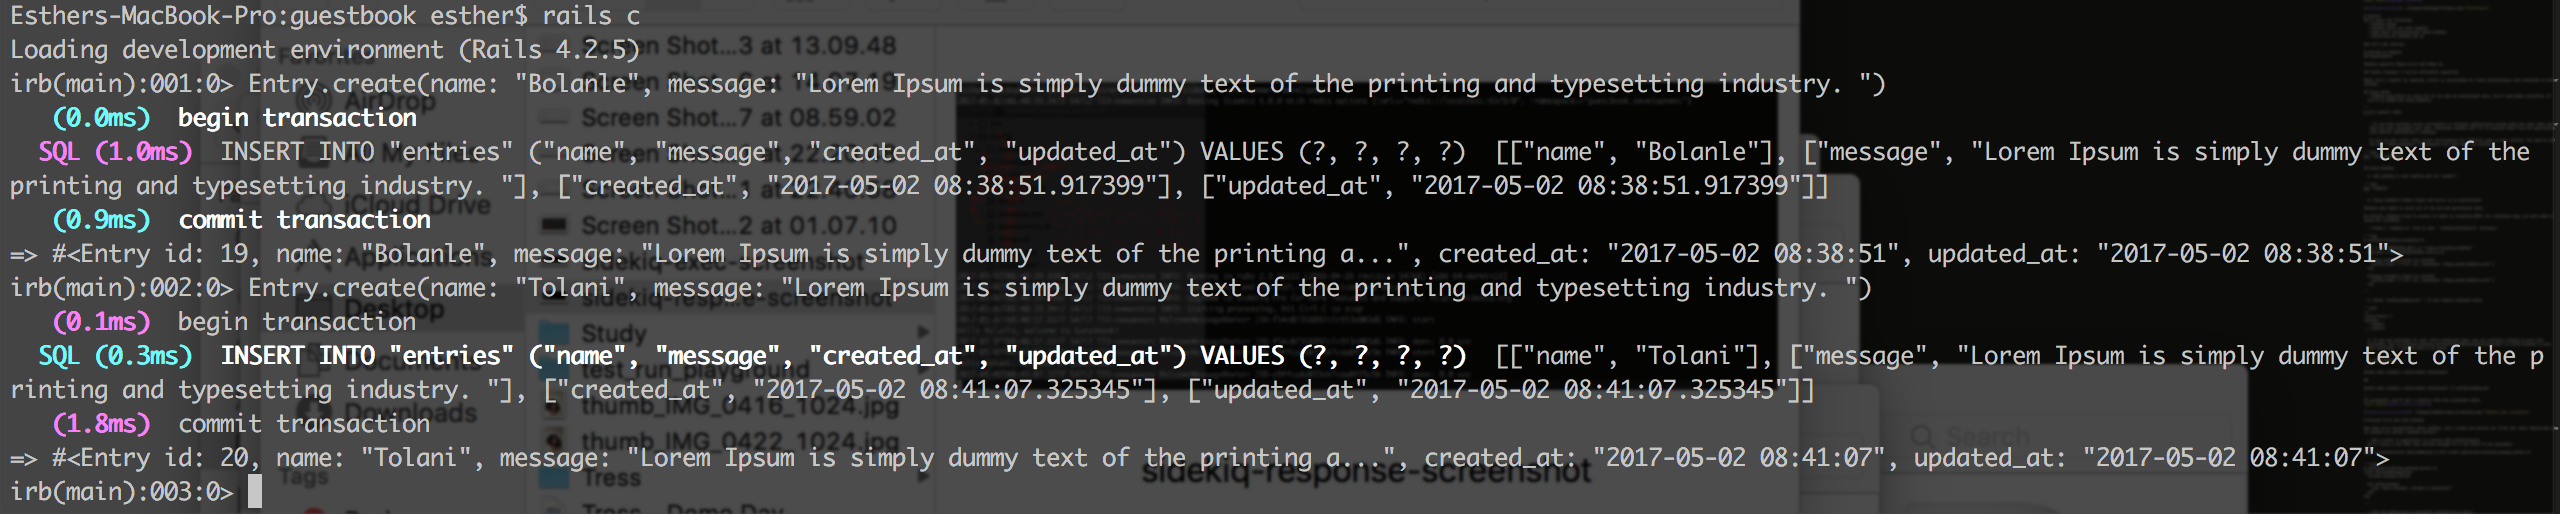
See screenshots below for responses when we create an entry from the console:
Send email using Sidekiq and ActionMailer
You can send emails asynchronously with Action Mailer out of the box with Sidekiq. Sidekiq has included three methods to the ActionMailer module.
They are:
.delay
EntryMailer.delay.welcome(@entry.id).delay_for(interval)
EntryMailer.delay_for(1.day).activate(@entry.id)- .delay_until(timestamp)
ruby
EntryMailer.delay_until(3.days.from_now).re_engage(@entry.id)
- .delay_until(timestamp)
N.B. If you use any of these methods above, Sidekiq supports delayed mailer by default, so there is no need to create separate workers to call mailers in.
Monitoring on sidekiq web ui
Getting the sidekiq web ui setup is as simple as just adding 2 lines of code to your routes.rb.
# routes.rb
Rails.application.routes.draw do
...

  require 'sidekiq/web'
  mount Sidekiq::Web => '/sidekiq'
...
end
Your sidekiq web ui for monitoring your backgrounds will be available at localhost:3000/sidekiq
See screenshot below:
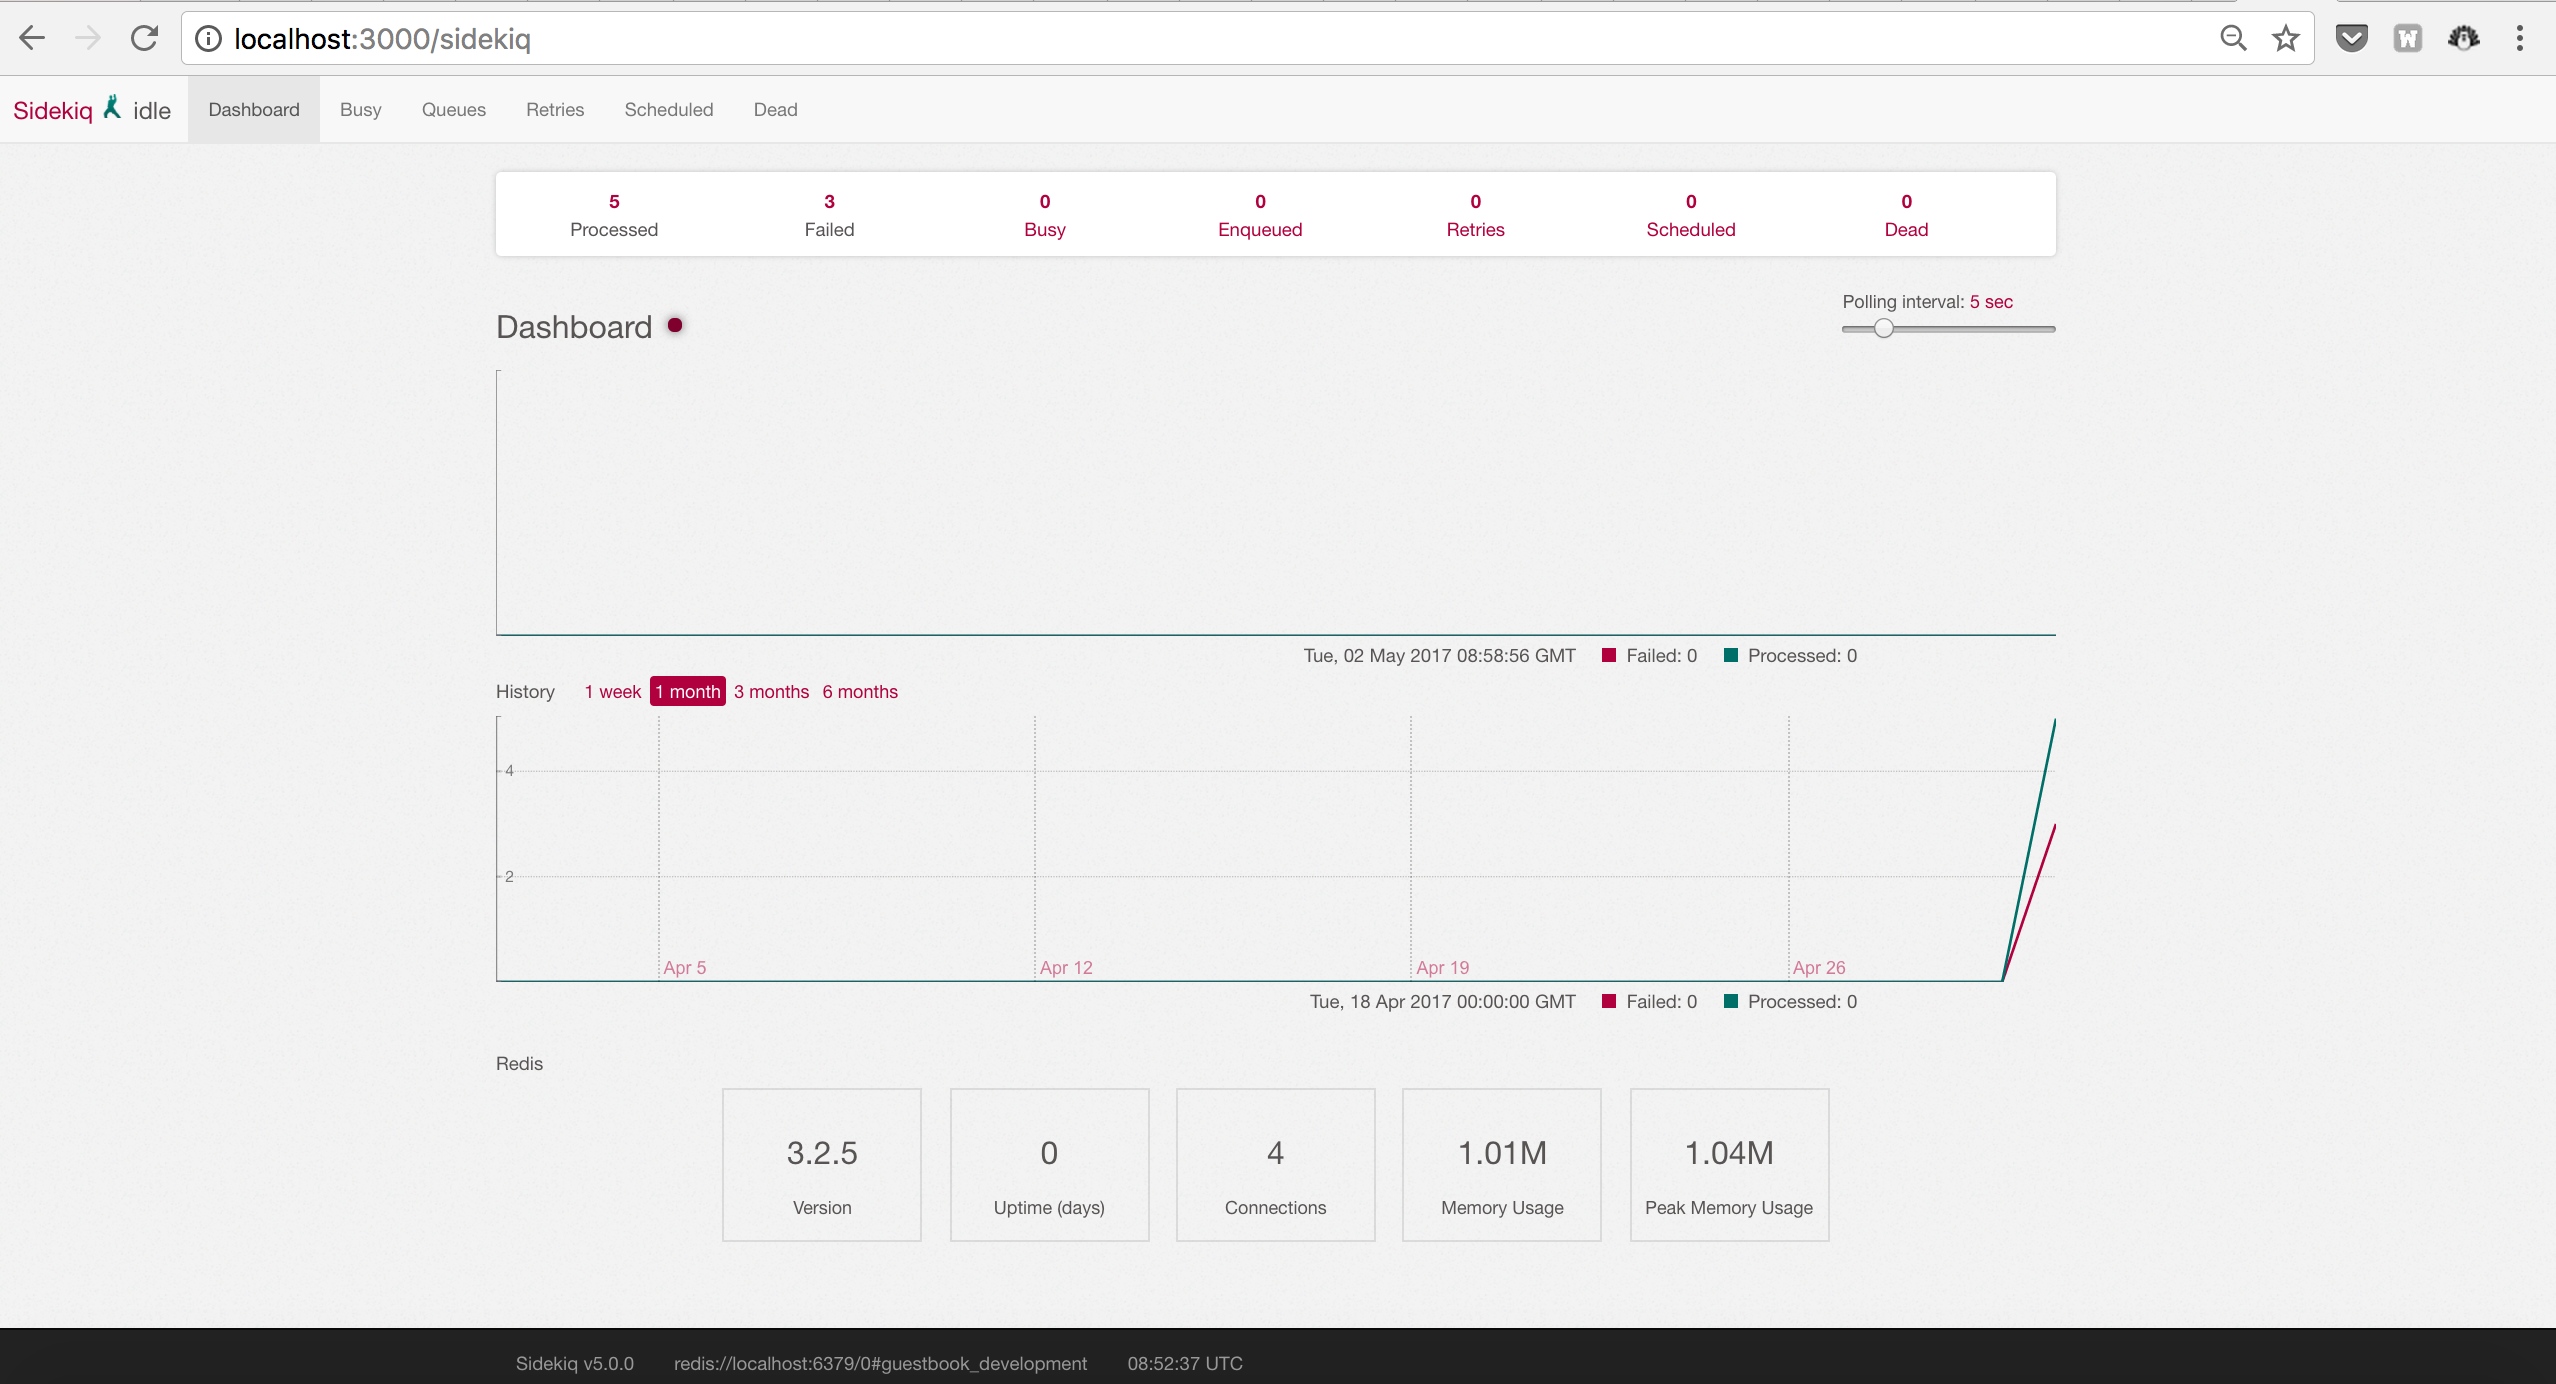
On a production app, it’s ideal that only an admin or authenticated user should be able to visit the sidekiq web ui. To set that up, see this doc.
That’s all for now. I’m a fan of how straightforward it is to setup Sidekiq on a new rails app, get the web ui with 2 lines of code and the fact that it retries failed jobs on it’s own.
I’ll be following up on this with the part 2 on switching from an existing Resque based backgrounds jobs system to Sidekiq and possibly run a benchmark test on both performances.
Let me know what your thoughts are on Sidekiq and if you’ll be giving it a try. If you have any questions on setting up, buzz me on @MsEOlatunde.